
DIY: How to Lay Laminate Flooring Yourself
Laminate flooring is a great alternative to wood and is very popular in UK homes. While visually similar to wood, laminate is hard-wearing and requires much less maintenance. As a hard floor option, laminate is great for areas with high footfall, such as entry halls, kitchens and living areas.
Laying laminate can be straightforward as long as you prepare thoroughly and carefully. The easiest type of laminate flooring to fit is known as tongue-in-groove laminate. The boards have a groove on one edge and a ridge or ‘tongue’ on the other. These fit together like jigsaw pieces to create a smooth, stable finish.
Bare Minimum Laminate Laying Tools
The tools needed for installing laminate flooring are straightforward, so make sure you’re equipped before you get started.
- A measuring tape: it’s important to get your laminate boards the right length for the room
- A pencil: don’t eye it – mark your measurements before you start cutting. These flat carpenters’ pencils don’t roll away from you while you’re working either.
- A hammer: tap the boards together effectively.
- A hacksaw: cut boards to the correct length. You’ll occasionally need to cut round shapes to fit around radiator pipes, so a jigsaw is recommended. A hacksaw is useful for straight cuts when you don’t have a power supply, but as jigsaws are relatively inexpensive, the time saved is well worth it.
- Gloves and Kneepads: to protect your hands and knees.
- A protractor: measure the room corners to make sure you cut at the right angle
- Spacers: these little plastic pieces maintain a set distance between the walls and your laminate floorboards, making room for expansion.
Tools To Make The Job Go Faster
To do a really good job quickly, you might more specialised tools. These are the top tools tradies use that can help laying laminate flooring go smoothly.
Spare jigsaw blades: you wouldn’t want to have to stop just because your blade is dull. Carry spares to avoid delays.
An impact bar and tapping block: to ensure a neat finish, use an impact bar (a.k.a. pull bar or crowbar) and a tapping block to click the boards together tightly, without damaging them. Most flooring pull bars have a built-in tapping block to hammer against. These are especially useful when you’re working on the edges of the floor and can’t get a hammer between the board and the wall.
Laminate Cutter: Like a paper guillotine, this tool cuts laminate boards quickly with a downward force. No clamp, dust or noise necessary, and a straight line every time.
Tips for Efficient Laminate Fitting Projects:
Check moisture levels before laying laminate on concrete
Concrete is porous, meaning water can sometimes pass through or stay in the floor. If you install laminate on damp concrete, the moisture will collect under the boards and cause them to warp and degrade. It’s worth checking, or you’ll be laying the same floor again in a just few years.
To check for dampness or moisture in a concrete floor, tape a piece of polythene sheeting securely over part of the floor and leave it overnight. Any moist air rising through the floor will collect as condensation on the sheet.
More accurately, you could use a professional moisture metre. With a reading of less than 3%, or 12% if using a pin-type metre the subfloor should be fine to work with directly.
If you’re concerned about moisture:
- Apply a liquid damp-proof membrane to the concrete. This is a bituminous substance that blocks moisture from rising and damaging the laminate.
- Use underlay with damp-proof protection built-in.
Let Laminate Boards Acclimatise
It’s advisable to allow the boards to acclimatise to the temperature and humidity of the room before you lay them. This way they don’t expand or contract after being fitted. Leave packs of boards in the room for 48 hours before fitting.
Use a tapping block
If you hammer the boards directly, they will break. Use a piece of scrap flooring or a wooden block to distribute the impact as you hammer boards into place. Plastic tapping blocks are more durable and can be bevelled to make room for the tongue & groove edging.
Use offcuts to start the next row
If you start each row with the other half of the board you cut for the row before, you’ll be making efficient use of the material. It also means the boards are staggered, rather than lining up their short ends as you go. This makes the overall floor stronger and more aesthetically pleasing.

DIY Laminate: How to Lay Laminate Flooring Properly
1. Prepare the Subfloor
Laminate can go over most substrates, including where underfloor heating is present. As long as the subfloor is clean, level and dampproof, you can begin fitting laminate flooring.
The floor must be smooth and clear of debris to get a quality finish. You may need to smooth any bumps and scrape off any drips of dried plaster or paint.
2. Install Underlay
Underlay adds padding beneath the floor, smoothing the subfloor. It also reduces the noise of the finished floor and adds thermal insulation. If you’re laying onto concrete, choose a damp-proof underlay, which has a membrane that will seal the floor against moisture. Foam sheets will fit this purpose.
To install underlay, cut sheets to size and lay them from edge to edge in rows. Use tape to hold them together and avoid leaving gaps.
Now you’ve reached the main part of the job. Keep working slowly and steadily to avoid mistakes at this crucial stage.
3. Lay your first row of laminate
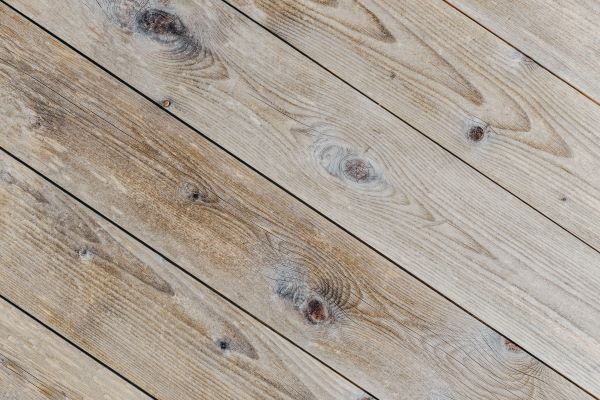
Whether you go lengthways or widthways across the room depends on the effect you want to create. Widthways can make a small room look wider. Alternatively, you might want to follow the line of light coming into the room, laying boards at a right angle to the window.
- Place a laminate board at the first corner, finished side up. The ridge side should be facing the wall.
- Wedge spacers between the end and edge of the board and the wall.
- Then place the second board in the same way, end to end with the first. Add spacers. Repeat until you can’t place any more full boards.
4. Cut a board to fit the gap at the end of the row
- Place a whole board, finished side down, next to the gap at the end of the row. The groove edge should be facing you.
- Measure and mark the length of the gap on the underside of the board.
- Cut with a saw or laminate guillotine.
- Fit the cut piece into position to complete the first row.
5. Start the second row
From the same end of the wall as the first row began, fit the first board. If the offcut from the first row is longer than 30cm, you can use it to start the second row. If not, you will need to cut a board to start the second row so that the joins are staggered.
- Use a spacer to create room for expansion.
- From a 20-30o angle, slot the tongue edge of the board into the groove of the previous row.
- Butt the board to the wall spacer
- Butt the boards together using a tapping block and hammer until they are firmly together.
6. Continue laying laminate boards until you reach the final row
Line up the next board and press into position with the same method. In most rooms, the final row will need to be cut lengthways to fit.
- Measure the gap between the last full row and a spacer.
- Use a saw to cut the board to size, making sure you cut from the tongue side.
- Lay as normal.
7. Fit skirting and trim
You can refit the original skirting or use D-trim to cover the edges of your new laminate flooring.

Fitting Laminate around Door Frames
Laminate looks best when positioned underneath the door frame by a few millimetres.
- Before you begin, use an offcut to mark the thickness of the laminate against the door frame.
- Saw horizontally into the architrave and remove excess wood with a hammer and chisel.
- Lay the rest of the boards as normal until you reach the last full board before the door frame.
- Measure the gap between the outside edges of the doorframe, as well as the width of the gap between the row and the door, minus the expansion gap of 10-12mm.
- Lay the next board against the architrave and mark the area that needs trimming to allow the board to fill the gap with a few millimetres under the architrave. You will likely have to cut an irregular shape, so measure carefully.
- If you are laying boards at a right angle to the doorframe, lay all the boards that come into contact with the architrave and mark them in the same way.
- Trim the edges of the board to fit the gap.
- You may need to slide a row back to fit the door piece(s). Make sure the board is under the architrave.
- Slide rows back into place and continue laying laminate flooring as before.
- For the threshold bar, measure and mark the interior width of the door frame, allowing for the spacers.
- Cut the threshold bar to size and secure it using adhesive or screws, depending on the type.
How to lay laminate floor boards around Radiator Pipes
Radiator pipes can pose a challenge for laminate flooring, but it is not impossible. Lay the rows as normal up to the point where you meet the pipe.
- Lay the board next to the pipe and mark a line from the centre of the pipe across the board.
- Measure the distance from the wall to the centre of the pipe.
- Mark a horizontal line across your first line at this distance from the edge. The intersection of these lines will be where the centre of the pipe sits.
- Using a 32mm spade or flat drill bit, drill a hole at the cross you’ve marked. Using this size allows for expansion of the pipe when hot.
- Use a ruler and draw two straight lines from the edge of the hole to the edge of the board that will meet the wall. Each line should be at a slight angle, widening at the edge.
- Cut along these lines. Keep the wedge shape that you remove.
- Lay the board as normal, with the radiator pipe in the gap you’ve made.
- Replace the wedge shape behind the radiator pipe and secure with adhesive.
- Secure a pipe surround with adhesive to create a professional finish.
You’ve finished! Congratulations on completing your first DIY carpet fitting project. Now that you know all about how to fit a carpet, you’ll be in demand when your friends and neighbours are redecorating. Hang onto those tools.
Avoiding Common Pitfalls in DIY Flooring
To review, let’s look at some of the most common mistakes in carpet fitting at home:
- Cutting To Exact Floor Space
- Don’t trim to the edge of the floor – leave as much excess as you can until you’re about to stretch and tuck that edge.
- Using the Wrong Tools
- Use a tapping block, for example, rather than hitting the laminate with the hammer directly. You could crack the laminate surface and waste a lot of pieces.
- Blunt saw blades will also lead to chips and cracks in the laminate.
- Not Cleaning the Sub Floor
- You might think a little dust won’t make a difference, but trying to lay on top of debris leads to boards slipping, problems with adhesive and bumps in the underlay.
Create a Professional Finish with Re-New Flooring Tools
At Re-New Flooring Tools, we carry a wide range of laminate flooring tools for professionals and DIY laminate beginners alike. We stock from top quality brands, including Sweeney, Janser, and Crain.
Tradesmen get the best tools for laminate flooring online for delivery from Re-New.